

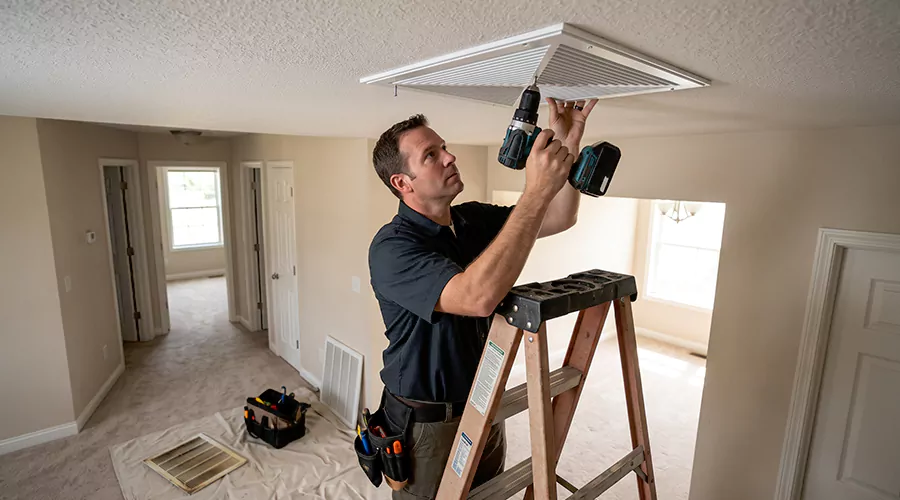
You can install central air conditioning in a home without existing ductwork by designing and installing a new supply and return duct system through professional air duct installation, selecting appropriately sized cooling equipment, and connecting the indoor and outdoor components. The installation also requires electrical work, refrigerant connections, condensate drainage, and airflow testing. Because the project involves several mechanical and building systems, a qualified HVAC contractor should manage the design and installation.
Many older homes were built before central air conditioning became a common residential feature. These properties may rely on window air conditioners, portable cooling units, or separate heating systems such as boilers and radiators. Adding central air can improve whole-home temperature control, but the lack of existing ducts makes installation more involved.
A traditional central air conditioner uses an indoor cooling coil and blower to condition air before distributing it through ducts. An outdoor condensing unit removes heat from the refrigerant, allowing the system to continue cooling indoor air. Without suitable ductwork, a conventional central system cannot distribute that cooled air to the rooms.
Homeowners therefore need to consider two main approaches. One is installing conventional central air with a completely new duct network. The other is choosing a ductless system that conditions rooms without a traditional whole-house air distribution network. Understanding the requirements of each helps determine which option is practical for the property.
Can You Install Central Air in a House Without Ducts?
Yes. A house without ductwork can receive central air conditioning when there is sufficient space to install the necessary air distribution network and HVAC equipment. New ducts may be routed through an attic, basement, crawlspace, dedicated chase, or approved ceiling enclosure. The installation should be designed around the home's layout and cooling requirements.
The contractor must determine how conditioned air will reach each room and return to the indoor equipment. Both supply and return pathways are necessary for proper forced-air circulation. Simply installing an outdoor air conditioner and one main duct will not provide a complete distribution system.
Some older houses have very limited space between floors or inside walls. Installing full-size ducts in these buildings may require substantial construction or changes to interior finishes. If suitable routes cannot be provided, a ductless heat pump or another approved cooling system may be a more practical choice.
The decision should follow an inspection of the building and an assessment of the cooling requirements. Floor area alone does not reveal whether conventional central ductwork can be installed successfully.
What Are Your Options for Adding Air Conditioning Without Ducts?
Several HVAC configurations can provide cooling in a house that has no existing ductwork. They differ in how air is distributed and how much construction is required. The best choice depends on the building's layout, installation budget, and comfort needs.
| Cooling System | Requires Traditional Ductwork? | Typical Application |
|---|---|---|
| Conventional central split-system AC | Yes | Whole-home cooling with newly installed ducts |
| Ducted central heat pump | Yes | Whole-home heating and cooling through ducts |
| Ductless mini-split | No | Individual rooms or multiple cooling zones |
| Ductless multi-zone heat pump | No conventional whole-house ducts | Several rooms served by separate indoor units |
| Small-duct specialized HVAC system | Requires a compatible smaller duct network | Certain restricted-space retrofits |
| Window or portable air conditioner | No | Individual room cooling |
A ducted heat pump is worth considering when the homeowner also wants to upgrade the heating system. Ductless mini-splits can be useful where conventional duct routes are difficult to install. Specialized small-duct systems require equipment and distribution components designed specifically for that application.
These options should be compared as complete installations. A low equipment price does not necessarily mean the finished system will be inexpensive when electrical work, indoor units, and building restoration are included.
What Should You Check Before Installing Central AC?
Installing central cooling in a home without ducts begins with evaluating the building. The contractor should establish the cooling loads, available mechanical space, and potential routes for a complete supply and return network. This planning helps prevent expensive changes after construction begins.
Home Insulation and Air Leakage
A house with poor insulation or significant air leakage may require more cooling than a comparable well-insulated property. The contractor should evaluate attic insulation, windows, and obvious gaps in the building envelope before selecting equipment. Planned improvements should also be considered during the load calculation.
Installing an oversized air conditioner does not automatically correct poor insulation. Oversizing can lead to short operating cycles and reduced moisture removal under some conditions. Correct equipment sizing should reflect the home's actual cooling needs.
Available Attic or Basement Space
Accessible attic or basement areas can make new duct installation more practical. An attic may allow ducts to connect to ceiling registers, while a basement can provide routes to floor openings. The amount of available clearance determines whether the ducts can retain their intended dimensions.
Conventional ducts should not be squeezed through spaces too narrow for their required airflow. A dedicated chase or soffit may be necessary where the existing construction cannot accommodate the passages.
Electrical Capacity
Central air conditioning requires suitable electrical supply for indoor and outdoor equipment. An older electrical panel may need evaluation to determine whether it can accommodate the new circuits and equipment load. A qualified electrician should handle any required electrical modifications.
The installation must also provide suitable disconnecting means and other electrical provisions according to applicable requirements. Equipment should not be connected through improvised household wiring.
Indoor Equipment Location
A central air system needs space for the indoor coil and blower. An existing compatible forced-air furnace may provide the required blower and distribution connection, but homes without forced-air heating often need a dedicated air handler. The equipment must have suitable service access.
The location also affects condensate drainage, duct routing, and operating noise. An attic installation may simplify certain duct routes but can require additional overflow protection. A basement or utility closet may provide easier access for future maintenance.
Local Permits and Older Materials
Installing central air typically involves mechanical and electrical work that may require permits. Finished-surface changes can also involve building inspections or other approvals. The contractor should identify these requirements before the project starts.
For homes built before 1978, disturbance of painted surfaces can trigger applicable EPA lead-safe renovation requirements. Suspected asbestos-containing insulation should also be assessed before disturbance. These precautions can affect the project schedule and budget.
How to Install Central Air Without Existing Ductwork Step by Step?
A conventional central AC retrofit combines new duct installation with cooling equipment installation. The following steps describe how a professional HVAC contractor approaches the project. Refrigerant handling, electrical connections, equipment commissioning, and major duct design should be performed by appropriately qualified personnel.
Step 1. Inspect the House
Begin with a complete assessment of the home's layout and existing heating equipment. Identify usable attic, basement, and crawlspace spaces for air distribution. Record where walls or ceilings may need to be opened.
The contractor should also evaluate insulation, windows, and other factors affecting cooling loads. Any planned renovation or building-envelope upgrade should be included in the initial discussion.
Step 2. Calculate the Cooling Load
Perform appropriate room-by-room cooling load calculations using a recognized method such as ACCA Manual J. These calculations account for building size, insulation, windows, orientation, and local climate. They provide a more reliable basis for equipment selection than floor-area rules alone.
Different rooms can have substantially different cooling requirements. A room with large west-facing windows may need more cooling than another room of similar size. The load calculation helps determine how much conditioned air each space should receive.
Step 3. Select the Central Air Equipment
Choose an air conditioner or heat pump that meets the calculated load. ACCA Manual S provides recognized residential equipment selection guidance. The contractor should also consider efficiency ratings, available electrical service, and compatibility with existing heating equipment.
A home without a suitable blower generally requires an indoor air handler. A home with a compatible forced-air furnace may allow a cooling coil to be added to the existing system. The decision should be based on equipment compatibility and airflow requirements.
Step 4. Design the Duct Network
Develop the supply and return distribution system using an appropriate method such as ACCA Manual D. The design should specify main trunk sizes, branch sizes, register positions, and return pathways. Pressure loss through fittings and duct lengths must be considered.
A complete design is especially important when the house was not originally built for ducts. The contractor should avoid long, restrictive passages created solely to conceal the material. Correct airflow is more important than forcing ducts into convenient but unsuitable spaces.
Step 5. Choose the Duct Routes
Identify the best practical routes through the building. Attics and unfinished basements are often useful because they provide access without opening large areas of finished walls. Multistory homes may need vertical chases through closets or other designated spaces.
Structural members should not be cut without an approved design. If a duct cannot pass through an existing opening safely, the route should be modified or a dedicated chase constructed.
Step 6. Select Register and Return Locations
Determine where supply outlets will distribute conditioned air effectively. Ceiling registers may be appropriate for attic systems, while floor or wall registers may suit basement installations. Placement should consider airflow patterns rather than convenience alone.
The return-air system also needs careful planning. Air supplied to a bedroom must have a suitable pathway back to the equipment, including when the room door is closed. A dedicated return, transfer grille, or properly designed jump duct may be appropriate depending on the layout.
Step 7. Obtain Required Approvals
Confirm mechanical, electrical, and building permit requirements. Some projects require inspections before walls or ceilings are closed. Any fire-rated penetrations or structural changes must follow approved construction details.
The installation schedule should account for these approvals. Work should not proceed through unknown hazardous insulation or improperly assessed structural members.
Step 8. Prepare the Equipment Locations
Establish suitable locations for the indoor and outdoor units. The outdoor equipment needs adequate clearance, a stable base, and appropriate service access. The indoor equipment requires suitable support and space for filter, coil, and blower maintenance.
The contractor should also plan refrigerant tubing, electrical connections, and condensate drainage. These components are separate from the ducts but are necessary for system operation.
Step 9. Install the Main Supply and Return Ducts
Position the main ducts along their approved routes. Rigid sheet metal is commonly used for larger trunks because it retains its shape and can be fabricated into suitable dimensions. Connections must be mechanically secured and properly supported.
The return trunk should provide sufficient airflow capacity for the selected equipment. An undersized return can interfere with blower performance even when the supply network is correctly installed.
Step 10. Install the Branch Ducts
Connect smaller branches from the main supply trunk to the room outlets. Insulated flexible ducts may be appropriate in accessible attics when installed with gentle bends and correct support. Other branches may use rigid metal depending on the design.
Each branch should match the airflow requirement for its intended room. Avoid excessive length and compression. The connection fittings must remain suitable for the duct dimensions.
Step 11. Install Register Boots and Grilles
Secure register boots to approved supports at the intended floor, wall, or ceiling openings. The connected duct should not be responsible for holding the boot in position. Gaps at the boot-to-building connection should be sealed where appropriate.
Supply registers should provide the designed airflow pattern. Return grilles must have suitable open area. Decorative covers should not reduce the effective airflow below the design requirements.
Step 12. Seal and Insulate the Duct System
Mechanically secure all duct connections and apply compatible sealing products. The Department of Energy recommends HVAC mastic or suitable listed closure materials for appropriate joints. Ordinary cloth-backed duct tape is not a reliable permanent sealing method.
Ducts in unconditioned attics or crawlspaces generally require insulation under applicable energy codes. Insulation should be continuous without significant gaps or compression. Appropriate vapor protection is also important where condensation can occur.
Step 13. Install the Indoor Cooling Equipment
Position and secure the indoor air handler or compatible evaporator coil according to the manufacturer's instructions. Connect the supply and return ducts using suitable plenums or transitions. The equipment must remain accessible for filter replacement and servicing.
The indoor cooling coil also requires appropriate condensate drainage. Attic equipment may need secondary containment or overflow protection under applicable requirements. Water drainage should be checked before the system enters regular use.
Step 14. Install the Outdoor Unit
Position the outdoor condenser or heat-pump unit according to the equipment specifications and local requirements. The location should provide required clearance and avoid unnecessary recirculation of discharged air. The mounting surface must support the unit securely.
Qualified personnel should install the refrigerant lines and electrical connections. Refrigerant work must follow applicable regulations and the manufacturer's procedures. This is not part of ordinary homeowner duct installation.
Step 15. Connect the Thermostat and Controls
Install a suitable thermostat and any required system controls. Some equipment may use communicating controls or particular wiring arrangements. The thermostat should be placed where it can sense representative indoor temperatures without direct exposure to unusual heat sources.
For multi-zone systems, the controls and dampers require additional design. Zoning should be compatible with the blower and equipment operating requirements.
Step 16. Complete Refrigerant and Electrical Commissioning
A qualified technician performs the necessary equipment checks, including refrigerant-side procedures, electrical verification, and startup according to the manufacturer's instructions. These tasks confirm that the cooling equipment operates correctly. The exact commissioning method depends on the equipment and installation.
A system should not be considered ready simply because the outdoor fan and indoor blower turn on. Appropriate charging and performance checks are necessary.
Step 17. Test the Ducts for Leakage
Inspect and test the new duct network according to applicable code or performance requirements. Leakage testing helps identify openings at trunks, plenums, branch connections, and register boots. Defects should be corrected before finished surfaces make the joints difficult to access.
Supply leakage wastes conditioned air, while return leakage may draw unwanted air from unfinished spaces. Both can undermine a new central cooling installation.
Step 18. Verify and Balance Airflow
Measure airflow and system static pressure using appropriate professional methods. Compare the results with the equipment and duct design requirements. Adjustments to balancing dampers may be needed to distribute air correctly.
Each room should receive the airflow appropriate for its cooling load. Equal airflow at every register is not automatically desirable. The contractor should evaluate the complete system rather than only the rooms closest to the air handler.
Step 19. Restore Building Surfaces
Close approved access openings and restore ceilings or walls affected by the duct installation. Fireblocking and required fire-rated penetrations must be completed appropriately. Existing insulation and air barriers should also be restored.
The homeowner should confirm that equipment access remains available. A newly finished ceiling should not conceal service components that require routine maintenance.
Step 20. Complete Final Performance Checks
Operate the air-conditioning system under suitable conditions and check normal cooling operation. The technician should evaluate relevant temperature differences, airflow, condensate drainage, and controls. Any deficiencies should be corrected before final acceptance.
Provide the homeowner with equipment documentation, filter specifications, warranties, and available leakage or airflow test results. These records help support future maintenance.
How Much Does It Cost to Install Central Air Without Ducts?
Published 2026 estimates place central air retrofits without existing ducts across a fairly wide range. Angi reports approximately $6,000 to $17,000 or more for adding central air in older homes without ductwork. HomeGuide estimates $7,000 to $16,000 for complete HVAC retrofits that include new ducts.
These figures describe somewhat different project scopes, and the final price depends on equipment and building conditions. Adding cooling to a home with a compatible existing forced-air furnace may cost less than installing a complete new heating and cooling system. Extensive wall restoration and electrical upgrades can increase the total.
| Project Component | Indicative U.S. Cost |
|---|---|
| Central AC unit installation with suitable existing ducts | $3,900–$7,900 in Angi estimates |
| New ductwork for approximately 300 linear feet | $3,000–$7,500 in Angi estimates |
| Older-home central air installation without existing ducts | $6,000–$17,000 or more |
| Complete HVAC retrofit with ducts | $7,000–$16,000 in HomeGuide estimates |
| Significant finished-surface restoration | Separate project-specific quote |
The equipment and duct prices may overlap with the quoted package totals, so they should not automatically be added to the complete retrofit figures. A contractor should provide one itemized installation estimate.
What If the House Has No Space for Ductwork?
Some older houses lack suitable routes for conventional full-size ductwork. Thin walls, finished ceilings, or limited attic access may make the installation expensive or disruptive. A contractor should identify these limitations before ordering central AC equipment.
Ductless mini-splits can provide cooling without a traditional distribution network. Multi-zone systems can serve several rooms using separate indoor units connected to outdoor equipment. This approach may reduce demolition when a conventional duct network is impractical.
Specialized small-duct systems are another option in selected properties, but they require compatible equipment and a specific engineered design. Ordinary central AC ducts should not simply be reduced to much smaller sizes to fit the available space.
Can You Install Central Air Using Existing Radiator Heating?
Yes. A home with radiator or boiler heating can receive central air conditioning as a separate cooling system. The new installation needs a compatible indoor blower and coil, outdoor cooling equipment, and a supply and return duct network. The existing radiators may remain in service for heating.
Alternatively, the homeowner may choose a heat pump that provides both heating and cooling through the newly installed ducts. The decision should consider existing heating equipment condition, operating costs, and installation complexity.
A contractor should not assume that radiator pipes can be used as cooling air passages. Hydronic heating and forced-air cooling use fundamentally different distribution systems.
Is Ductless Air Conditioning Better Than Adding Ducts?
Ductless cooling can be a good alternative when the house lacks practical routes for conventional ducts. It avoids the need for a central air distribution network and can provide individual room temperature control. However, it usually requires visible indoor units and appropriately designed refrigerant and electrical connections.
A ducted central system can provide more concealed indoor air delivery and may integrate with an existing forced-air furnace. It may also be appropriate for homeowners who prefer a single distribution network serving the house.
Neither approach is automatically better for every property. The comparison should consider the complete installed price, appearance, maintenance, comfort, and the structure of the home.
What Mistakes Should You Avoid?
A central air retrofit is a substantial investment, and poor planning can create costly performance problems. The most common errors involve incorrect equipment sizing and unsuitable duct routes.
Avoid these mistakes:
- Choosing AC capacity only from floor area.
- Installing equipment before confirming that ducts can fit.
- Designing supply ducts without adequate return pathways.
- Using undersized ducts to avoid building modifications.
- Cutting structural framing without approved engineering.
- Installing flexible ducts with excessive bends or compression.
- Leaving connections unsealed.
- Omitting suitable insulation in unconditioned spaces.
- Ignoring electrical capacity and required equipment clearances.
- Failing to provide condensate overflow protection.
- Disturbing suspected asbestos-containing insulation.
- Overlooking applicable lead-safe renovation requirements.
- Closing walls before duct leakage testing.
- Skipping equipment commissioning and airflow balancing.
Correcting these mistakes after construction can require reopening finished ceilings and walls. A design-based installation helps reduce that risk.
How Long Does Central Air Installation Take Without Ducts?
A straightforward central air retrofit may take several working days when ducts can be routed through accessible attics or basements. More complicated installations in finished older homes can require additional time for chase construction, permits, and restoration. The complete project may last longer than the mechanical installation itself.
The contractor should provide a schedule covering ductwork, equipment installation, electrical work, and final testing. Specialized material assessment or major construction changes may affect the timeline. Installation should not be rushed by omitting testing or proper sealing.
Conclusion
Central air conditioning can be installed in a home without existing ductwork when suitable routes are available for a properly designed supply and return network. The project requires correct equipment selection, new ducts, electrical and refrigerant connections, drainage, and professional performance verification. Older homes may need additional construction and hazardous-material precautions. Ductless systems can be practical alternatives where conventional ductwork is difficult to install. Before choosing equipment, request a cooling load calculation and compare complete installation proposals.